
 I teach 4th-6th grade maths, history, coding and game design at Skt. Josefs Skole in Denmark and also work as Education Officer at Immersive Minds. I’ve been part of the Minecraft Mentor program since the summer of 2016.
I regularly share the work I do in and out of the classroom on Twitter @katjaborregaard and @ImmersiveMinds
This spring will mark my two-year anniversary with Minecraft: Education Edition. I was part of the first beta-testing, and I have come a long way as a Minecraft Educator since then – and so has the game. I’m happy that I’ve had the opportunity to grow with the game. If you’re just getting started, you can read about how I got started here.
Through both of my jobs I seek to create engaging and meaningful learning for my students. I especially like for my students to create (as in identify and find) problems and to solve and create solutions for those problems.
Whenever my students work on innovative projects where they have to produce a prototype for a solution to a problem, they always have the option to use Minecraft: Education Edition to build it. The kids love it because Minecraft offers many different materials, mechanics and programming – in a safe environment where many of my students are experts.
Previously they had to show their creations in the Minecraft world. This wasn’t a problem, but made the presentation a little less smooth by working in different media and made the creations less realistic and real-world connected. However with the update of Minecraft: Education Edition in the fall, where 3D Export has been added as a feature, my students now have the possibility of showcasing their Minecraft creations in 3D.
This feature makes the design process come full circle. From idea to design to build and then finally to see the creation in real life – and my students are loving it!
You have to use a structure block (See guide further down in this post) to export your Minecraft builds to 3D. After exporting you can use your 3D export in many ways. Here are some examples.
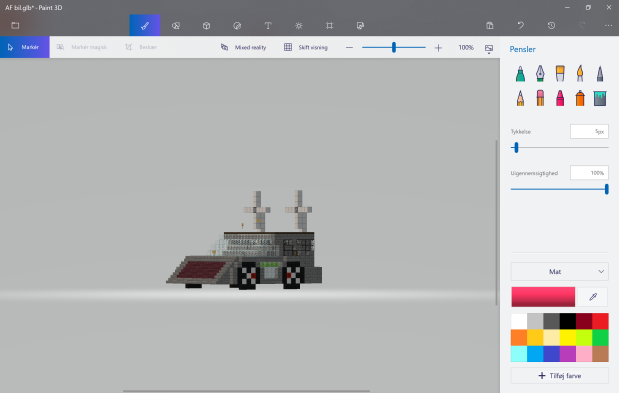
Rework your model in Paint 3D and print if you have a 3D printer:
Use the 3D model in a pitch by adding it to a Power Point presentation:
This is amazing for innovation and design projects where the students have to pitch their idea or to show proof of learning on a topic they have been working on in the game.
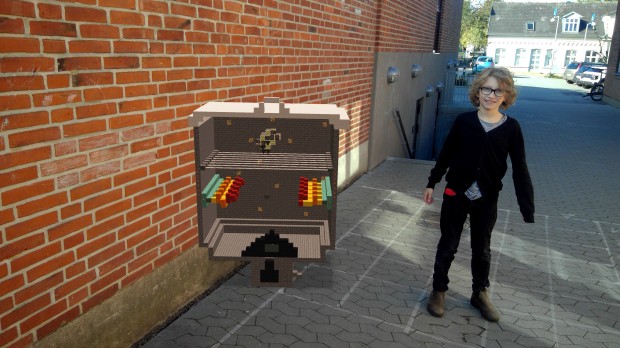
Use the Window 10 Mixed Reality Viewer to place your Minecraft 3D model in a real life setting
Here are some examples of student creations placed in real world settings using the Windows 10 Mixed Reality Viewer:
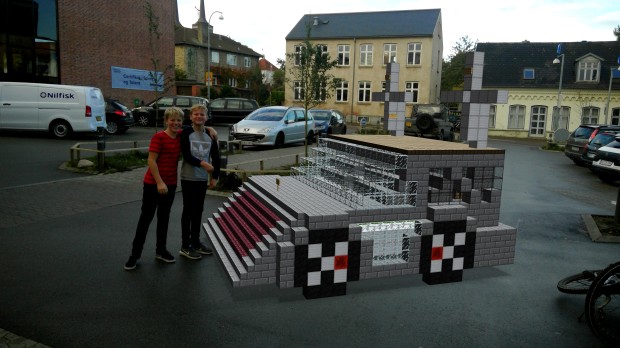
Environmentally friendly car
I tweeted the above picture out and got some really nice words from Microsoft CEO Satya Nadella:
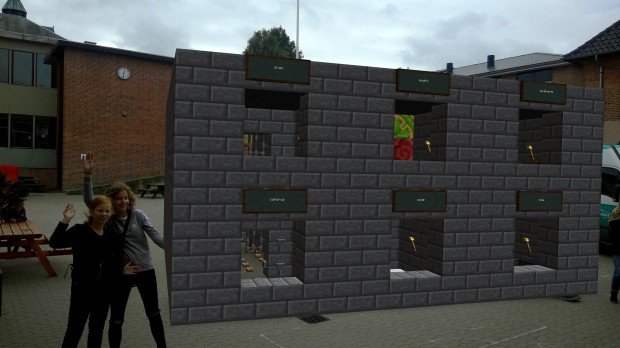
Recycle station
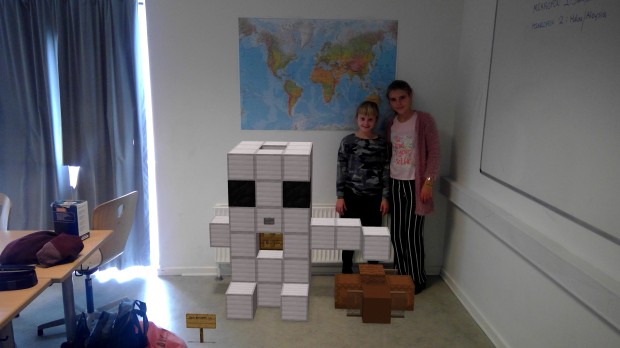
Trash robot
Trash can that burns trash
As you can see there are plenty of ways to use the structure block and 3D export to make your students’ creations come to life.
The structure block is easy to use – I even managed in my first try (and I still consider myself a n00b) using the guide on the Minecraft: Education Edition website.
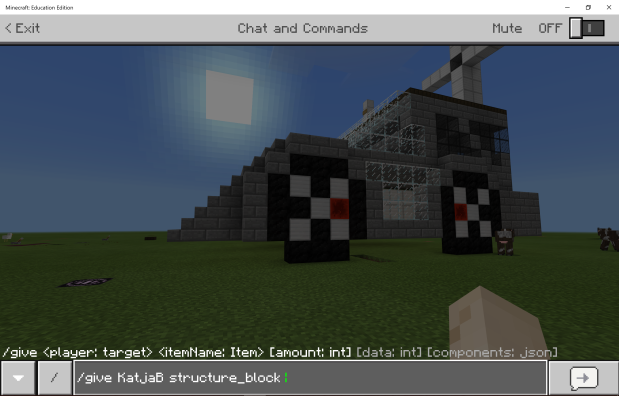
Use /give command to give yourself a structure block
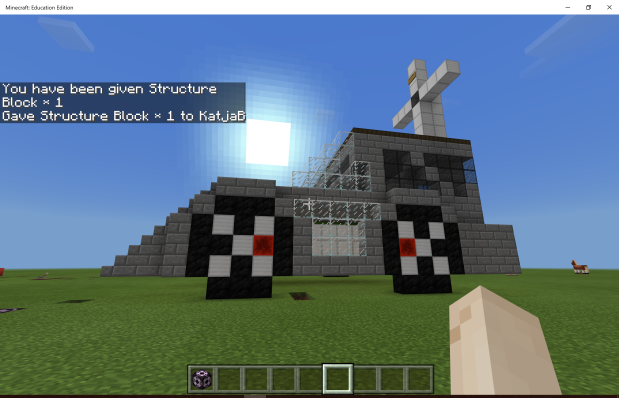
Place structure block
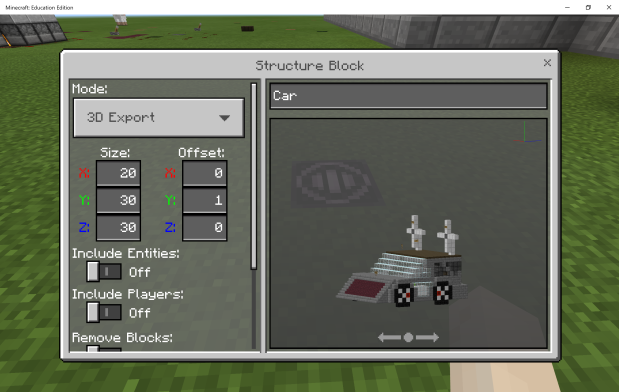
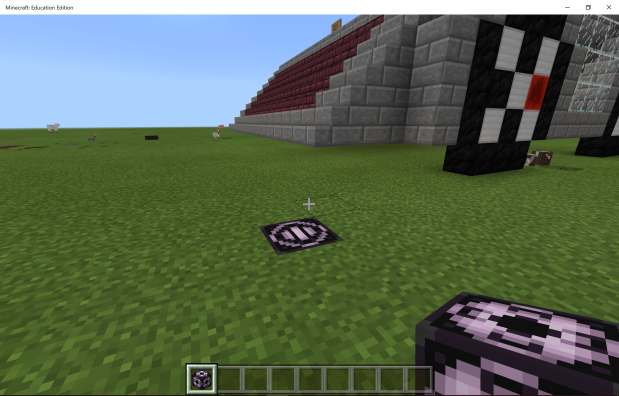
Set the size and see your creation come to life, then export as a 3D file
Use the hashtag #3DMinecraftEdu to share your Minecraft: Education Edition 3D creations and follow Minecraft: Education Edition to get all future updates.

Truly awesome! Thanks for all you do.
LikeLike